This Will Also Test if Python is Working Correctly

You will recall from earlier installments in this Cooking with Python and KBpedia series that one design objective was to include a Python integrated development environment. The two leading IDE options within the data science community appear to be PyCharm and Spyder. Both are natively supported by our Anaconda package manager that we discussed in CWPK #9. My initial investigations indicated that PyCharm, the more popular option, was perhaps a bit more Mac oriented, maybe of more interest to coders and hackers, and perhaps less so from data scientists. PyCharm is one of a suite of well-regarded tools and environments from JetBrains. Spyder, on the other hand, draws its name from Scientific PYthon Development EnviRonment, has a cleaner look to my eye, and a paned layout I find a bit more intuitive.
Of course, the real worth of an IDE comes from its use, and some time of familiarity is always required before a judgment of adequacy can be made. Since my intuition steered me to Spyder, I chose to install it first. If it proves productive, there will be no need to veer from it. If I am not fully satisfied, I can always switch out to PyCharm or perhaps another alternative. This flexibility was a major reason for starting this Python process with the Anaconda distribution.
Since in the last installment we took the steps offered by the Anaconda Navigator GUI to install our Jupyter Notebook environment, let’s take the direct command-line approach for Spyder. Fortunately, we know that Spyder installation is already part of the Anaconda installation, so our task is much simplified to merely starting up and using the application.
To begin our Spyder use, invoke the Windows Start menu and call up the Anaconda prompt option:
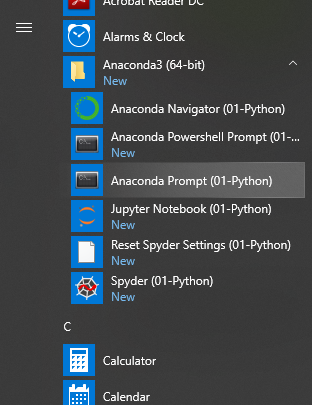
That calls up a command window, where we enter at the prompt, (base) C:\users\mike>spyder. (Your directory structure will differ.) That brings up the basic Spyder IDE, as shown in Figure 2:
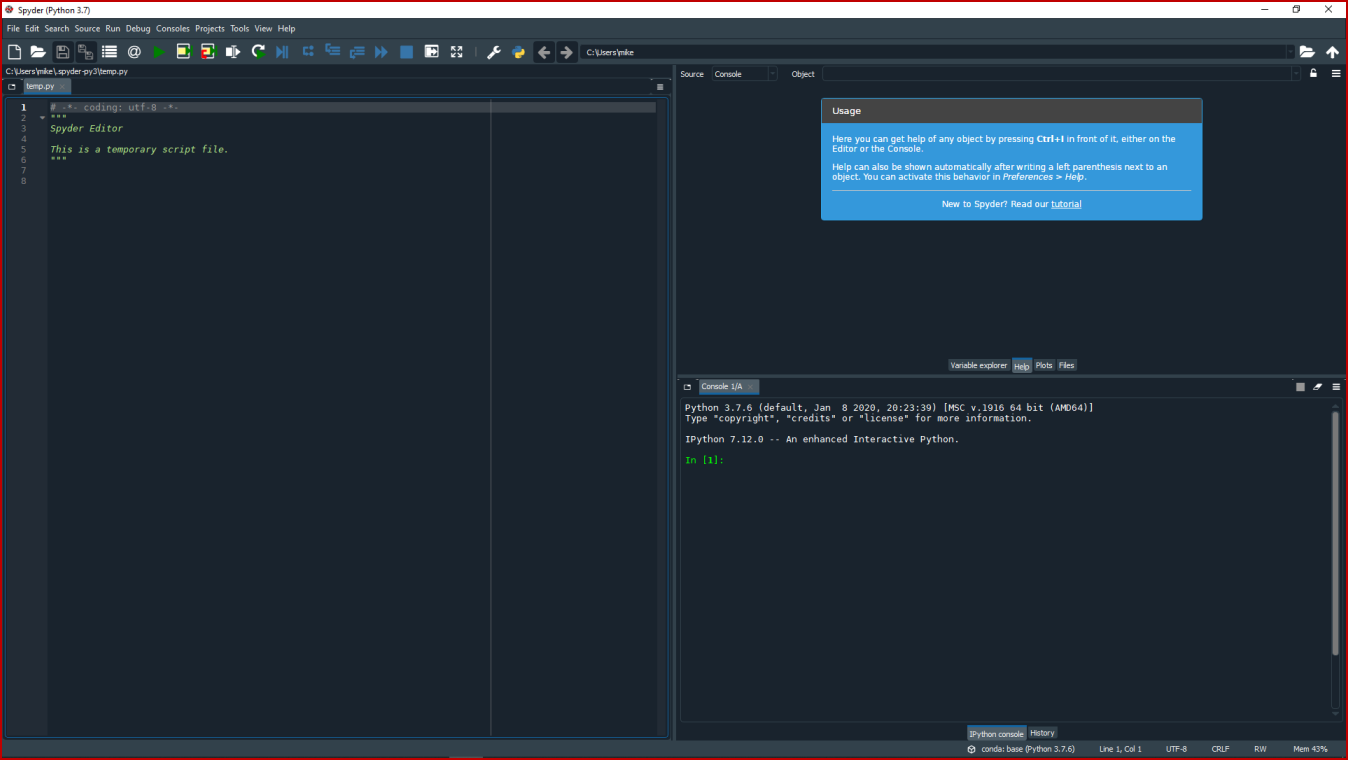
However, if this is the first install, you might also get a popup window over this telling you that your Spyder version can be updated. It is important to remember that Python applications (of which both Anaconda and Spyder are examples) invoke many components to operate. These components are often shared by other applications and developed by third parties. Numerous releases of various component parts are constantly occurring throughout the Python ecosystem. One important role of package managers is to query for updates, alert you if components are out of date, and then enable you to update your packages. If you are an infrequent user of Python you will likely get update prompts for various components every time you use the system. Even daily use will see update notices quite frequently. If you see this notice that Spyder is out of date, Quit the program.
If you are only slightly out of date, you likely do not have concerning security holes or obsolete apps. You can proceed without updating. However, it is good practice to always respond to update requests. In this instance of the initial install of Spyder, we decide to install (and get rid of the annoying update screen at start-up). We go to File→ Quit on the Spyder screen. Since we started Spyder at the command line, we return to the command window. (If you had started up with the Anaconda Navigator option, you likely will need to go through the Anaconda prompt steps above to bring up the command window.)
We can first update Spyder alone, and see if that leads to a clean start-up. At the command prompt enter (base) C:\users\mike>conda update spyder. The update facility will be invoked and you answer the prompts in the command window. When you re-start Spyder, however, you may again see the need to update screen. This likely notice is due to the fact that there are many dependencies across your entire Python environment. The better way to answer update prompts is by updating the entire environment. You invoke this more complete updata by entering at the command prompt: (base) C:\users\mike>conda update anaconda. (Your directory structure will differ.) Now, we see many packages needing to be updated and thus a more active update screen, as this Figure 3 example shows:
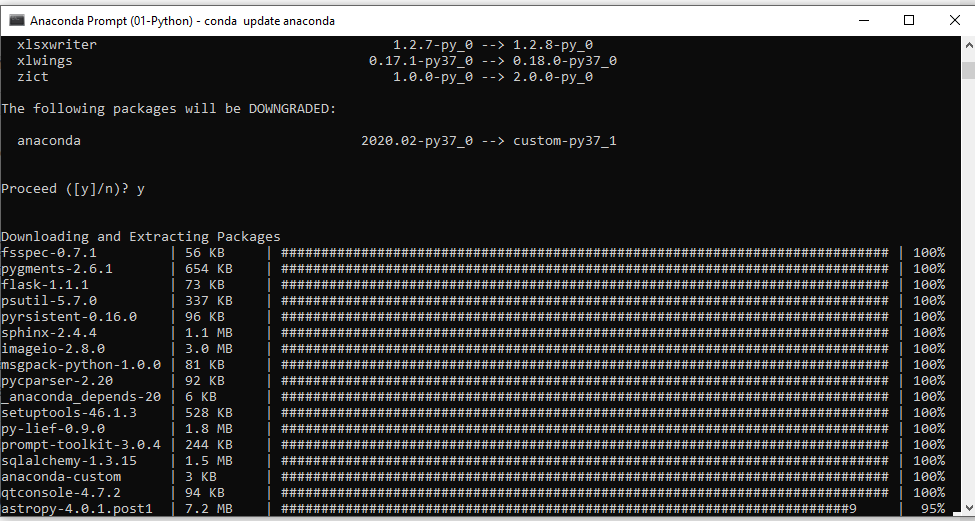
When you see the successful completion notice on the update, you can again start the Spyder IDE, now updated and missing the update notice screen.
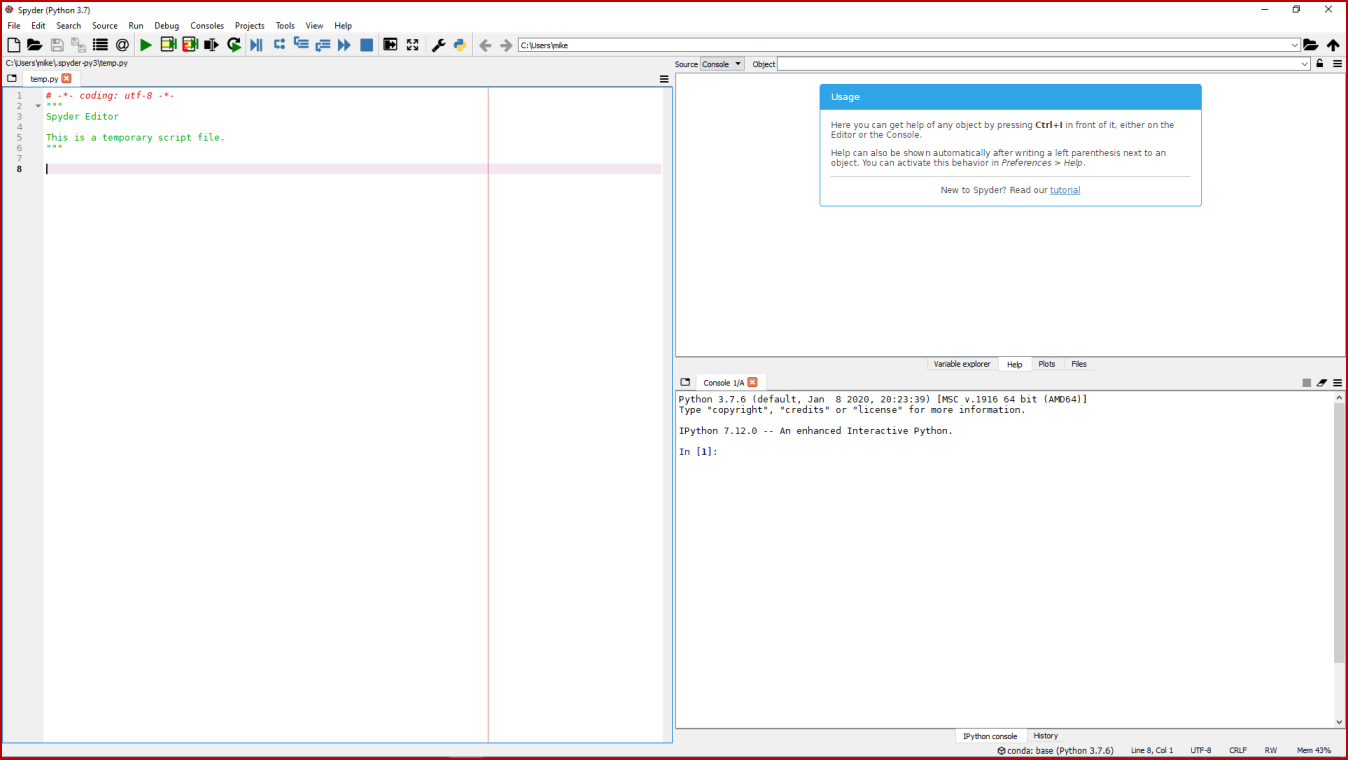
So, now we have an updated, current Spyder and Anaconda environment, with Spyder now invoked. By default at install time, Spyder is configured to use the currently popular dark theme, Spyder Dark. As a personal preference (and it is better for screen captures throughout our CWPK series) I like a lighter theme. To change the theme, we go to Tools → Preferences and then the Appearance option and see a listing of interface specifications:
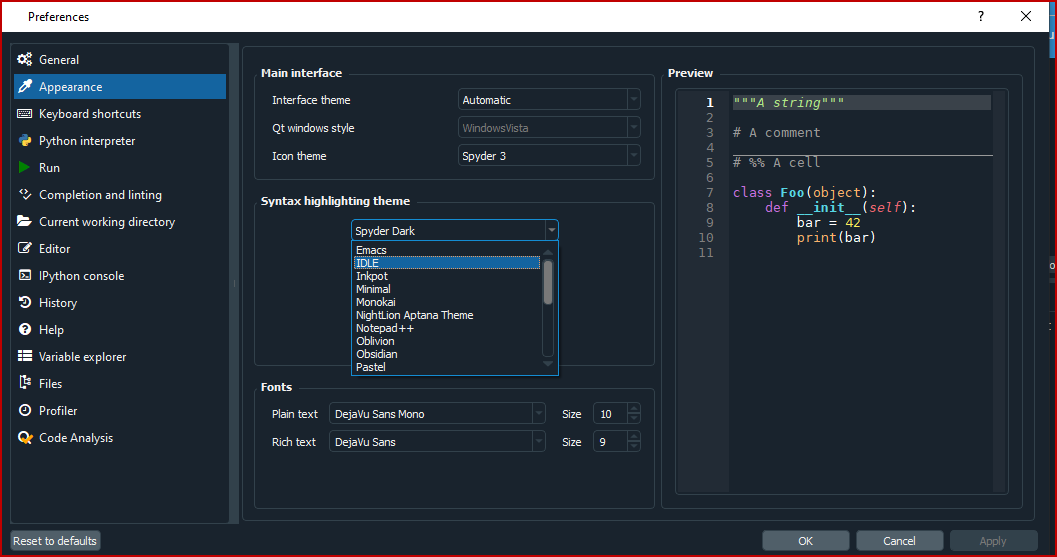
We pick ‘IDLE’ since we know it to be a light one. (There are many loaded configurations you may test as well as create your own.) Once we select and hit the OK button, we are prompted if we want to re-start in order to use the new theme. We accept, and now see a different UI theme as shown by Figure 5:
It is always a good idea to start any coding work with a project. We pick the Projects main menu option on main Spyder screen to do so:
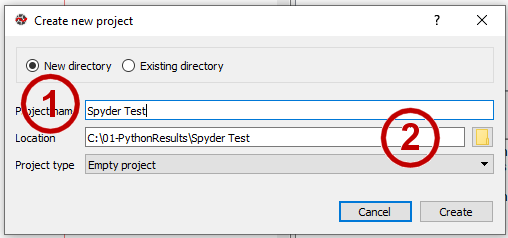
We give our project any arbitrary name (1) and indicate the location for that file (2). It is a good idea to set up a known, separate directory location for your Python work. In my instance, I chose a new Results directory at the same level as my Python directory. By following this practice you will be better able to find prior work after absences away from the projects.
As you enter this project information, you may have been sharp-eyed and saw that a new pane has been added to the main Spyder screen at the left (2), as shown in Figure 7, which now gives us a chance to explain the panes and functions of the main Spyder IDE screen:
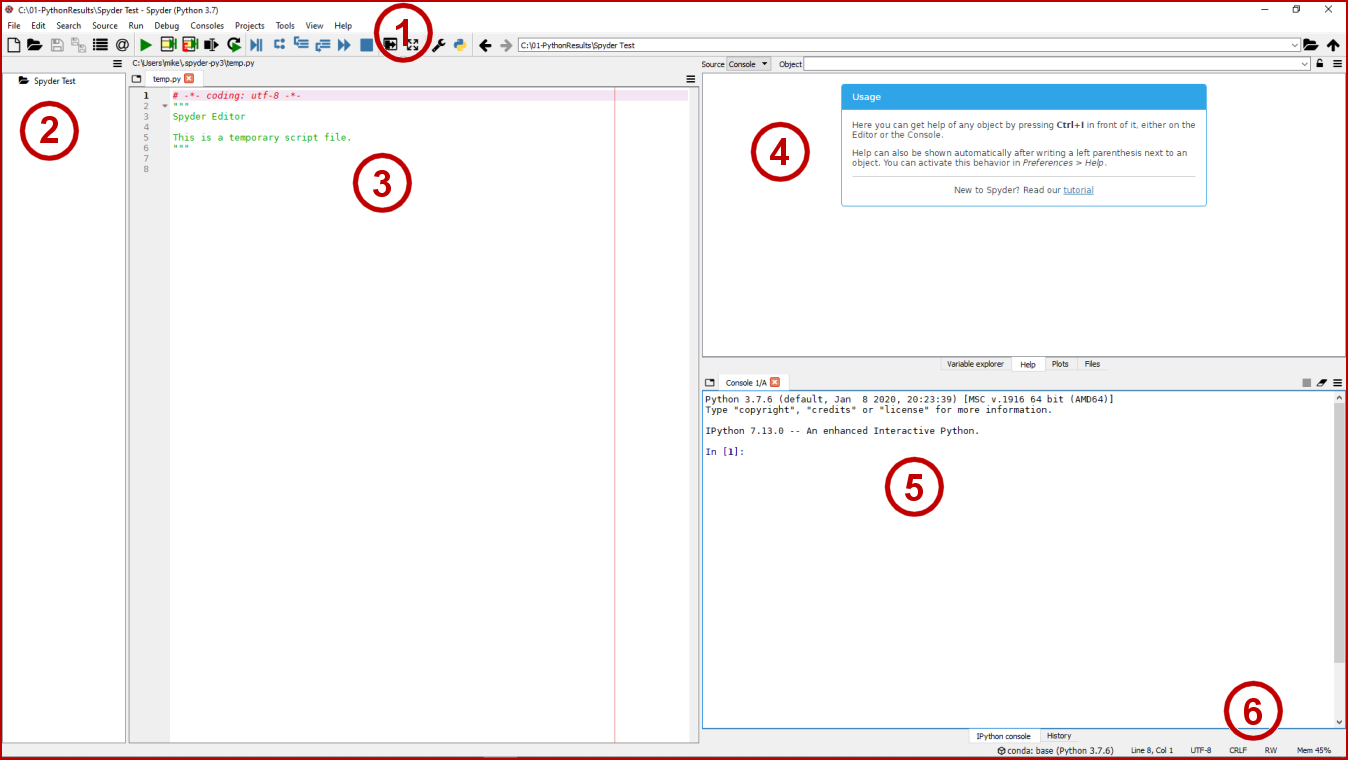
At the top of the main Spyder screen we have the main menu (1). It is a good idea to systematically move from menu item to item to see the functionality included in the Spyder IDE. Immediately below the main menu is the Toolbar. Again, you may mouse over each icon to get a tooltip of what functionality it represents. Note the icons are provided in groups, with debugging options provided in the middle, for example.
The leftmost pane (2) is the Projects pane. As your projects grow and you organize them, they are listed here in the traditional directory tree structure. Right-clicking on a project enables you to open, delete, use, etc., the project.
The main code editor is found in pane (3). Syntax highlighting and code completion assists of various natures may be invoked here, similar to any modern code editor. This is a window in which we will spend much time throughout this CWPK series. A general help area is provided in pane (4). You can pull up the general help, and get various prompts or assistance. In context, we will touch on some of these in later installments.
The console (5) is an interactive environment that shares the same iPython core with the Jupyter Notebook. Individual statements can be tested and run using REPL. Also, we can highlight code blocks in the editor (3) and they will run in this pane.
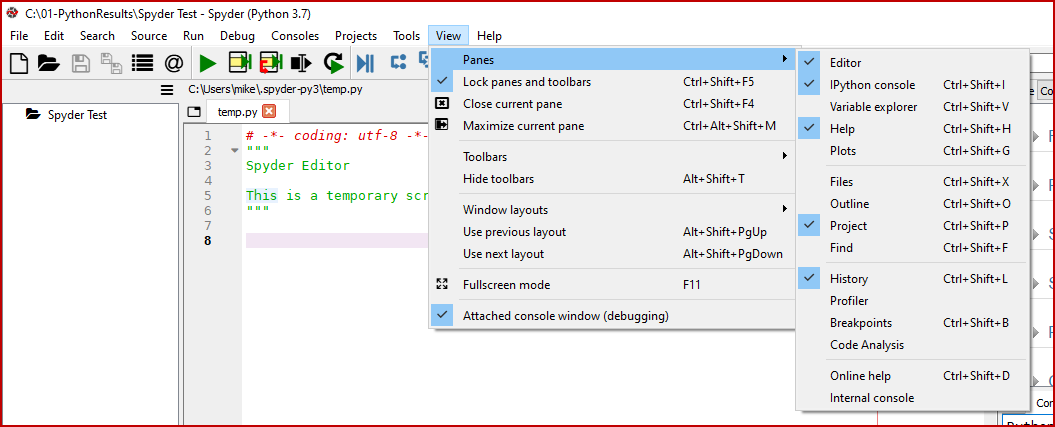
Notice that the horizontal pane separators may be moved. Each pane also has an upper right icon (![]() ) that provides contextual options for that pane, including the standard options of Close or Undock. If you choose the Undock option, the pane becomes floating. To return it to its original position, chose the option to Dock. Note if you close a pane, you may open it up again via the View more Panes options. The ones we have active in this initial installation are shown in Figure 8 below.
) that provides contextual options for that pane, including the standard options of Close or Undock. If you choose the Undock option, the pane becomes floating. To return it to its original position, chose the option to Dock. Note if you close a pane, you may open it up again via the View more Panes options. The ones we have active in this initial installation are shown in Figure 8 below.
You will notice that there are many possible panes in Figure 8 that are not shown as active. But, also notice we do have a History pane that is active that we have not yet discussed. When there are more panes selected for view for which there is not adequate screen space, multiples will appear in a given frame area as sub-tabs. If you look closely at the lower right of Figure 7 you will see this additional History tab (6). We also see some status information at the lower right in Figure 7 (6) that tells us what version of Python is presently loaded, line and character positions in the editor (3), etc.
If you only work occasionally with Python perhaps these options are enough to give you a fast configuration that meets your needs. Much of the stuff behind the scenes in Spyder, however, like other IDEs, is devoted to allow constant users to tweak the system to exactly how they want it.
OK, so now we have gotten a bit familiar with Spyder and have configured it a bit to our liking. It is now time to write our first program. We will use Figure 9 to illustrate this process:
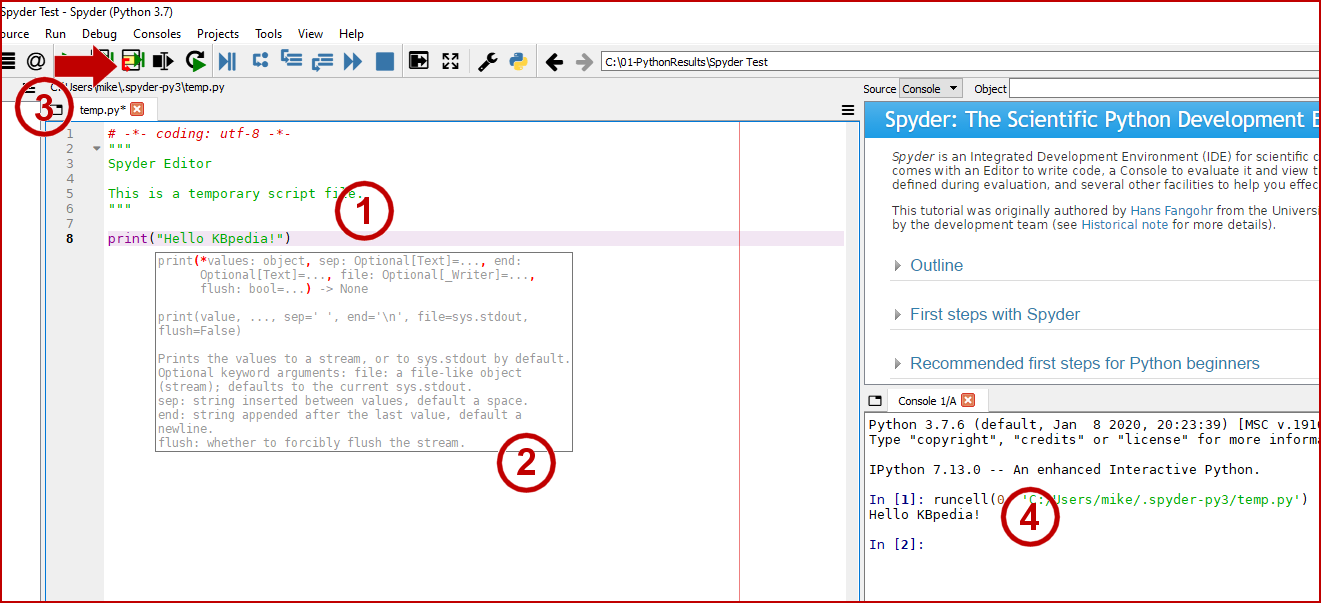
As with our previous lesson with Jupyter, we enter the statement print("Hello KBpedia!") (1). Note that as we enter statements, we get some autocomplete suggestions for our print statement. Once we have completed our statement, we can run this cell (3) from the Toolbar, which is another way of saying to run the current line, and its results appear in the console (4). Note we could just have easily entered the same print statement in (4) and gotten the same result evaluation. The difference, of course, is that statements entered into the editor are part of a conventional Python (*.py) source program as opposed to a single interactive statement. The same Toolbar where we ran the cell also allows us to run code blocks or the entire source program depending on the icon we select.
Now that we have completed our first file, it is time to save it, as shown by Figure 10:
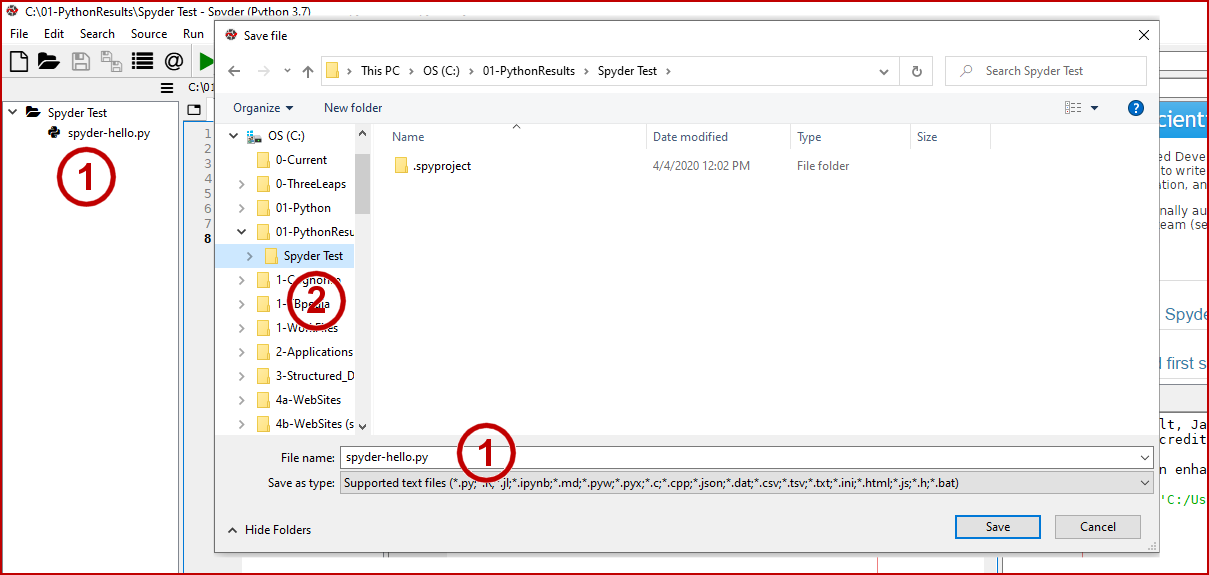
The system allows us to save the code file anywhere, but again best practice is to enter the file name (1) under the same directory as our project location (2), which enables it to show (1) in the project pane. We then File → Quit to exit the program.
We will learn much about the Spyder IDE as we move forward. Here are some additional resources to learn about Spyder further:
- Spyder documentation
- How to Install the Python Spyder IDE and Run Scripts
- What is Python Spyder IDE and How to Use it?


